
Start with your first notes
Start from your welcome card, add course material and find your next study action.
Step 1. Open Study
Sign in and open Study. Your welcome card greets you by name. Choose + Add to bring your own material. On an empty account, open Try an example first for a short sample. With material, follow the main recommendation; Your notebooks shows up to three recent notebooks. Use Search all notebooks or View all to find the rest. Your progress stays collapsed until you open it.
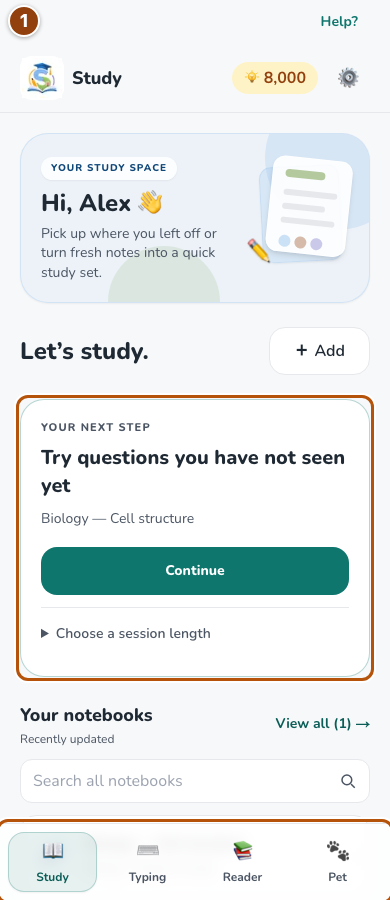
Reference 1 · The numbered outline marks the useful controls. Select the screenshot to enlarge it. Step 2. Add your material
Choose + Add to open What are you adding? Select Paste or write notes, Upload a file, Snap homework or Create a study guide. After choosing a PDF or text file, select Study it for notebook material or Read it for a private Reader book. An image uses the study-notes path in this chooser; Reader also has its own photo import.
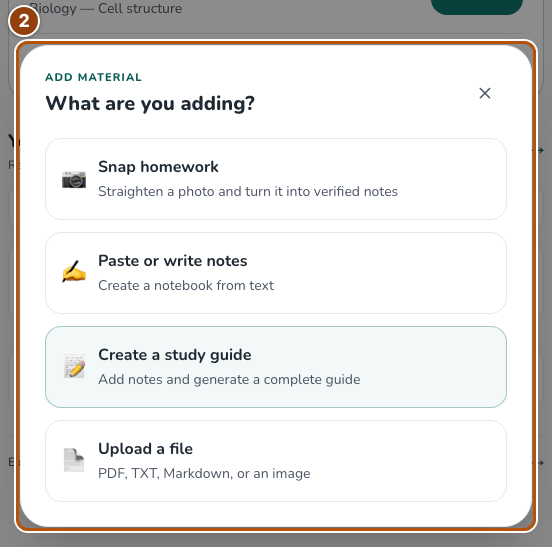
Reference 2 · The numbered outline marks the useful controls. Select the screenshot to enlarge it. Step 3. Create a notebook
Enter a recognizable Title and paste your notes. Choose a Subject when you have one, then Create notebook. If you uploaded material through Add, check the Review your notes screen before saving. Correct the source text before generating questions.
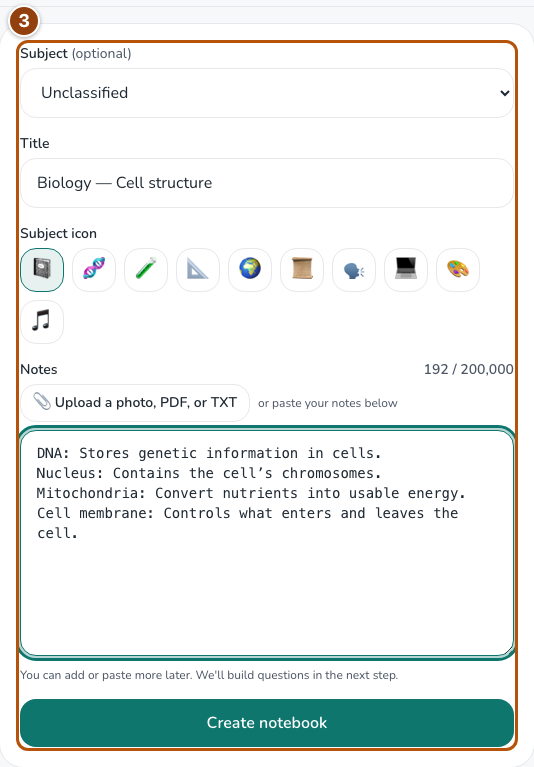
Reference 3 · The numbered outline marks the useful controls. Select the screenshot to enlarge it. Step 4. Build and check your study tools
Open the notebook and choose Generate study sheet & questions. If Note Check asks you to review a passage, resolve it first. Wait for the progress stages to finish, then read the study sheet in Learn. Use Revision sheet (PDF) for the printable version.
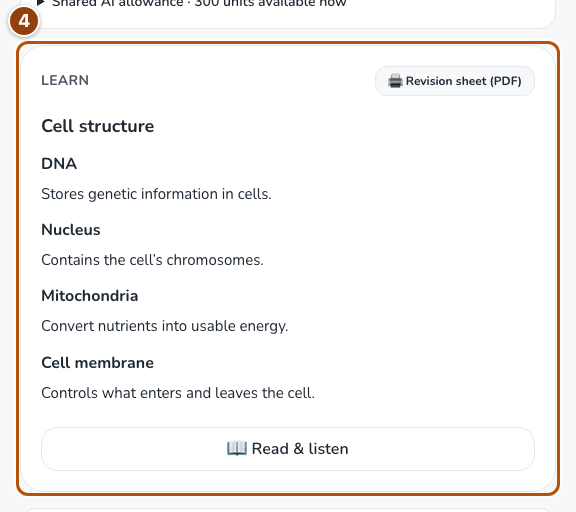
Reference 4 · The numbered outline marks the useful controls. Select the screenshot to enlarge it.